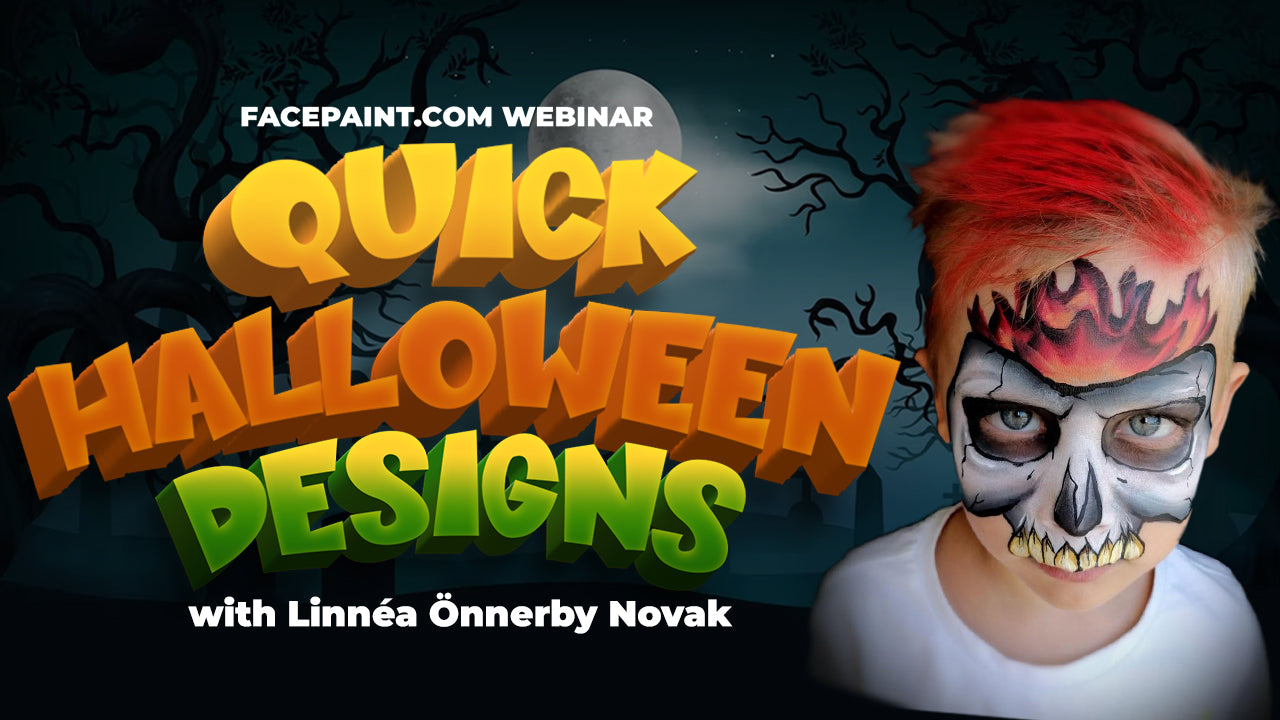
Tools:
Medium #4 Round Brush
Mehron Hydra Foam Sponge (cut in half)
Medium Filbert
baby wipes or cloth
water container
(optional) Spray bottle with water
Colors used in this picture:
Diamond FX Essential Black
Diamond FX Essential White
Tag Body Art Light Green
Application:
1. Starting with a half of hydra sponge, and the black face paint, add some black shading to the face. Sponge on black over the eyes, the nose and underneath the mouth.

2. Using the round brush and the green face paint, add a small amount of green paint to the brush. You’re going to add the little bit of green to the white face paint. This will allow your white to have a slight tint of spooky green that you can use several times. When you are done, simply wipe the white face paint with a cloth or baby wipe to remove the tint.
3. Using the half of hydra sponge, and the tinted face paint, cover the entire face, blending the black into the white.

4. Take the filbert brush and load generously with white paint. Paint teeth over the top lip, and on the sides of the mouth by pressing down firmly with the brush. Make sure the curved end of the brush is pointing up.

4. Finally, taking the #4 round brush and the black face paint, add lines and details. Trace around the teeth, adding additional lines going up the face. Add more vertical cracking lines on the forehead, and around the eyes. Add wrinkle lines going across the nose. Paint the bottom lip black, and add drip marks coming down from underneath the mouth.