 FREE SHIPPING FOR USA ORDERS OVER $50


Your face painting order has arrived, and your first face paint palette glimmers in all its glory on the table in front of you as you hold brush in hand, contemplating what your very first face painting design will be. Hmmm. You need to start somewhere, but what should you paint?
Practicing the most popular designs will help you determine the most efficient route to take in painting them, so your first design should be one of these as you will most likely be called upon to paint it repeatedly. Even though you've seen the images on the internet from established artists, some of those seem a little complex for a beginner, and at many events, you have to be quick as well as good at what you do.
For this reason, the rainbow is a perfect beginner design. The easiest and most popular design is a rainbow painted over the eye. It's a great line-closer for when you have a few children left in line when your time is up at an event and lends itself to many rainbow variations which we'll also cover in this post.
How to Face Paint a Basic Rainbow
How to Face Paint a Rainbow Princess
How to Face Paint a Rainbow Butterfly
How to Face Paint a Standard Tiger
How to Face Paint a Basic Rainbow
In order to paint a simple rainbow, use the following supplies:
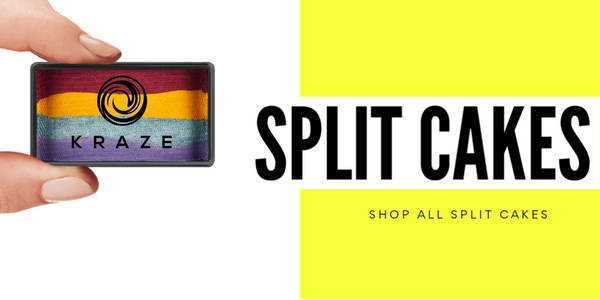
- Rainbow small split cake (Kraze FX Harbor Sunset used in photo)
- White face paint
- A 3/4-inch or a 1-inch flat brush
- Medium round brush or filbert brush
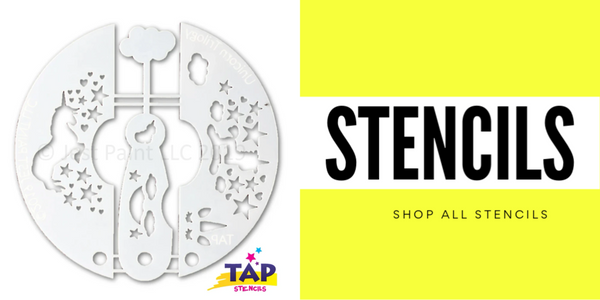
- Star stencil
- Dauber or sponge
- Iridescent cosmetic grade glitter
- Mehron Starblend - Starblend white
- Smoothie blender (lollipops)
Dip your large flat brush in water, and blot it on a towel or paper towel so it isn't dripping with water. It does need to be wet, but if there is too much moisture on the brush, the rainbow colors will mix into each other and become muddied.
Loading a brush for face painting is different from loading it for traditional painting, because you want to drive the face paint up toward the ferule. Press the brush firmly on the surface of the rainbow split to fully load bristles and stroke back and forth at least twelve or more times for a full load. If your brush is too dry, barely dip the edge of the bristles in clear water before continuing the process. If your brush is not wet enough, there will be unpainted patches within the stroke. The best way to become versed in loading the brush well is practice. Soon it will become second nature for you.
Check out this video on how to activate face paint!

To create a simple rainbow once the brush has been fully loaded, position it over the eye with the edge of the bristles at a 45 degree angle and move it around the eye in a semi-circle, twisting the brush as you move it and ending on the cheek bone.
If you've loaded your brush correctly, you shouldn't have any blank patches in your rainbow, and each color should be vibrant. Try to stay below the hairline and above the eyebrow if possible. This is not always possible, since it depends on how much forehead you have to work with, but hair tends to interrupt the brush stroke and create spots which have no face paint on the skin.

Next, load a medium round brush or a filbert brush with white. At each end of the rainbow, create a cloud shape. The cloud shape you choose is up to you, but keep in mind that realistic clouds are usually puffy on top and flat on the bottom.
Cartoon clouds, on the other hand, tend to be puffy with scalloped edges on all sides. If you have a cloud stencil, you can definitely use it instead of painting your cloud by hand. There isn't a right or wrong choice, but whatever you choose will depend on the amount of time you have to complete your design and what your personal preference is.

You may choose to increase the value of your design with either stenciling (stars) or glitter. For high volume events, the simple rainbow is sufficient, but for smaller parties where you can take a little extra time with each guest, it's great to add extras to make the design even more special.
Remember that glitter must be added while the face paint is still damp or it will not stick to the design, so if you're using a poofer bottle of cosmetic grade iridescent glitter for this purpose, add it immediately after you've painted your rainbow. If you use pots of glitter, you may use the damp sponge or dampen your finger tip on a wipe, dip it in the glitter, and tap it onto the spots you would like to have glitter on.
There is important information which should be considered when it comes to glitter, because if you're new to face painting, it's better to know ahead of time rather than finding out by trial and error after you're at an event and it's too late.
As it turns out, not all glitter is the same. Generally, face painters use translucent glitterrather than opaque glitter for face painting. This is because translucent glitter, while as shiny as it's opaque counterpart, is also partially see-through, meaning the design underneath is not completely obscured by the glitter on top. This gives you the advantage of enhancing a design without covering it up.

If you are only planning to use a few colors at first or want to create a small, portable kit, good translucent color choices are a white, a light blue, a pink, and a light purple. Most painters carry an array of colors, but I've found I use these colors more than any others.
It is possible to use opaque glitters on designs, but usually artists place opaque glitters directly over the same color of face paint. For example, and artist might make red holly berries in a design at Christmas and then place opaque red glitter over only the berries in the design. This definitely adds an extra level of wow to any design, but requires that an artist carry a larger variety of colors, since she must match the face paint colors. (For the most part, opaque glitters are used when creating glitter tattoos, since they completely cover the skin below.)
And a final word of warning, since this is especially important from a safety standpoint. Never use craft glitter while face painting. Cosmetic grade glitters differ in what they are made from (non-toxic plastics), what they are dyed with (FDA compliant pigments), what shape they are cut in (circular shapes rather than angular shapes), and how finely they are milled (smaller rather than larger pieces). They are even processed differently to keep out foreign substances.
By comparison, craft glitters are not subject to such careful scrutiny. They might be made from glass, metals, or other substances, are usually cut in shapes with sharp edges and points, and do not fall under the same restrictions from the FDA as to what type of dyes are used to color them, since they aren't meant to be put on the face. The biggest danger from them is to the eyes, since craft glitters could potentially cut a person's eye, and we're talking about a trip to the emergency room dangerous. No face painter wants to be responsible for sending a child to the hospital.
If you choose to make stars by hand, use your round brush to make small dots and starbursts on and around your rainbow. In order to make a dot with a round brush, it should be loaded with fully activated face paint. One common mistake for new face painters is to not work the water into the face paint long enough to create a nice, creamy consistency. As a result, they have a watered-down version of white which isn't as opaque as they would like it to be.
You have to watch this with other colors as well, but it is usually most obvious with light colors or neon colors. To make dots, hold your loaded brush so that it is perpendicular to the surface (the face) and touch the skin, but do not push down much. You want a nice, round dot, not an odd shape.
Learn how to make perfect dots and stars in this video!
For starbursts, hold the brush perpendicular to the surface, and always beginning from the center of the star, use the tip of the brush to create each short stroke, lifting off the skin, in four directions—up, left, right, and down.
If you prefer to use a star stencil, load your sponge or dauber with white paint, making certain it is not too wet (or it will bleed underneath the stencil), hold the stencil firmly in place over the rainbow after it has completely dried, and firmly press sponge or dauber down on the star shapes.
As an aside, do not be concerned that using a stencil might be construed as "cheating." Some artists within the industry choose not to use stencils, but a stencil is as much a tool as any other utensil you use, such as a brush or a sponge, and adding texture with a stencil is an excellent way to add perceived value and visual fun to your designs.
Stencil usage does require practice, but if you struggle with controlling bleeding underneath your stencil from using a sponge or dauber which is too damp, instead consider using a dry powder, such the Mehron Starblends and a smoothie blender with stencils.
To use a dry powder to add stars to the rainbow design, load your smoothie blender (lollipop) from a white powder. Tap the blender on the edge of the white powder container to get rid of the excess. place a star stencil over you design and lightly tap or rub the loaded blender across the star shapes. When you remove the stencil, the white stars should be in place.
Congratulations on completing your first face painting design! It may seem like a simple design to begin with, but you'll use it many times in the future, and in completing it, you've learned several useful techniques such as loading a flat brush correctly and how to make dots and stars.
Once you've mastered the basic rainbow, you can create rainbow variations. When a child gets into your chair and asks for a rainbow, you might ask if the child would prefer a rainbow princess or a rainbow butterfly or a rainbow tiger (or kitty), which are other fun designs which can incorporate rainbow colors.
How to Face Paint a Rainbow Princess
The best thing about the rainbow princess is that you use all of the same supplies you would use for the basic rainbow. It is what is considered a one-stroke design, so for this design, load your 3/4" flat brush in the same way you did for the basic rainbow.
Once you have a full load, create a teardrop shape in the middle of the forehead, just above the eyebrow line.

If you're right handed, add scalloped shapes from the hairline to the tear drop on the left side of the design first (your left side). Then complete the scallops on the right side of the design so that they look the same as the left hand side, running from the teardrop up into the hairline. Add glitter now if you would like to, while the design is damp.

The trickiest part of this design is placing the rainbow "eyeshadow" over the eyelids. Ask the child in the chair to close her eyes. Because she won't be able to see the brush coming, warn her that you're about to lightly touch her eyelids with the brush. A warning should keep her from flinching or opening her eyes while you're working over them.
Place the brush so that the flat edge of the bristles lines up with the eyelashes at the inner eye.

Begin to twist the brush to follow the shape of the eye.

Continue to twist the brush while moving toward the outer edge of the eyelid.

Taper off the end of the design so it is pointed.

In case of a very young child, you may omit painting over the eyelids or instead use a little color on a sponge to lightly add eyeshadow to the eyelids. Use your best judgement for what you may safely do so you don't take risks with young children. Some kids do not like face paint on their eyelids at all.

Next, load your medium round brush with white face paint. You may use the photo as a guide for adding teardrops and dots to the design, or you might try your own ideas to decorate the tiara and eye areas.

Spend some time looking at your favorite artists in order to see how they position the teardrops. It will help you get a feel for what works well in terms of composition. The Facepaint.com 411 Learning Center on Facebook has a downloadable practice sheet for teardrops if you'd like to practice them.
How to Face Paint a Rainbow Butterfly
Almost any design can be created with a rainbow, but another possible rainbow adaptation which is an excellent choice for one of your first designs based on it's tremendous popularity, is the rainbow butterfly. For the rainbow butterfly, you'll need the following supplies:
- Large Girly Girl Rainbow split (or your favorite rainbow split cake)
- Medium round brush
- White face paint (Kraze FX used in example)
- Petal sponge
Begin by loading your petal sponge with the pink (lightest color) on the small tip of the sponge and the purple or dark colors on the wide, outer part of the sponge. Some artists prefer to spritz the sponge rather than the face paint itself before loading, while some simply spritz the face paint. Either way, you don't want to leave a puddle of water on the colors after loading.

Press the sponge gently over the eye area to form a butterfly wing shape. The great thing about sponges is that they can be squeezed into whatever shape you would like, so make use of this advantage when you're face painting. You aren't limited by the shape of the sponge.
Use the same sponge to make the lower wing as well, keeping this wing smaller and more on the cheek bone. You don't want to take it too far down the jaw, because if you do, it will make the butterfly look bottom heavy and oddly shaped.

If you'd like to make a butterfly mask, duplicate the wings on the opposite side of the face. If you'd like to add glitter, make sure you apply it before the wings dry entirely. In a dry environment or in arid climates, this can be challenging, so if necessary, you may add your glitter as you complete each side.
To make a side butterfly which is only over one eye, you may add a small partial wing shape behind the one in front on the top. For high volume events, artists often choose the side butterfly option.

Load your medium round brush fully with a creamy white and create swirls on the upper and lower wings, following the example in the photo. Don't forget to add a butterfly body in the center, although if you prefer, you can replace this with a lovely gem cluster.

While this rainbow butterfly used only white for the swirls, you could use any color for them. If you do choose other colors, make sure you add white highlights or an extra white outline to make the design really pop on the face.
How to Face Paint a Standard Tiger
Our final rainbow design is a tiger, although by using spots rather than stripes, it could be easily transformed into a cheetah. For the tiger in the example, I only used half of the rainbow with the Kraze FX large split Sundown, since it's one of my favorite color choices when creating tiger designs, but you could just as easily use a full rainbow.
- Kraze FX Sundown large split
- Medium round brush (or large round brush)
- White face paint (FAB used for sponging in this example)
- Black face paint(Kraze FX used in example)
- Half circle sponge (Mehron hydra foam circle cut in half)
Load the curved edge of your sponge with white to sponge over the temples, eyelids, bridge of the nose, and upper lip.

Load the flat side of the brush from the Kraze FX Sundown split or your favorite rainbow large split. Keep darker colors to the outside of the face and the lighter colors toward the nose. Children love the opportunity to choose which type of tiger they will have painted, and while most are done in a traditional color scheme, I've had requests for white, pink, blue, and rainbow tigers, among others.

Load your medium or large round brush from black, making sure you have plenty of face paint on the brush and that it is a good, creamy consistency. The consistency is important to keep you from running out of face paint in the middle of a stroke and to keep the edges sharp for your line work.
Create the side which is opposite your dominant hand first, so if you're right handed, do the left side first. Start at the mouth and create the line which will define the muzzle and the eye area. Duplicate this on the right when you're finished.

Add the lines coming from the corner of the eyes as well.

Now it's time for your tiger stripes. I generally begin on the forehead, and once I've created these lines, add those below the eyes. Do not be haphazard in placing lines on your tiger. This step is worth practicing on your practice boards until you have it down, because good line work will wow your clients. To create the tiger stripes, you'll create strokes of thin (on the very tip of the brush) to thick (pressing down) to thin (releasing pressure and going back to the tip of the brush).

Repeat process with the lines under the eyes. The direction of your lines is important to the overall design. You need the lines to point toward the focal point which is between the eyes.

This tiger is almost complete, and he just needs a few finishing touches in the form of a nose, muzzle lines, and teeth, all of which are made of some form of teardrops.
To make the nose, bring a teardrop from the outside edges of the nose in toward the middle. Connect them in center and paint a line down to the lips. Some artists like to paint the lips of their tiger design, so whether you will do this or not is up to you. For the example, I just left white sponged on the upper lip.

Use three black teardrops which are curved slightly coming toward the center from just over the outer edge of the muzzle line. Do not connect them to the center line. There should be some white space there. Using a medium brush and white, add your tiger teeth. Normally I would use a lining white like Kraze FX for this step, but it's okay to use the white you used for sponging if you prefer it or have it handy from the earlier step.

Add a few black dots to the outer areas of your tiger design to fill any open spaces.
If you've been working along with the post, you've completed at least four popular designs which you will use many times in the future as a professional face painter, and you've learned several valuable skills, such as how to load a flat brush and how to sponge face paint.
For more great videos and posts with great face painting information to help you, stop by the Facebook group, the Facepaint.com 411 Learning Center. We've got units loaded with helpful tips and tutorials just for you there.
_____
Beth MacKinney (Marengo, Illinois) is the owner of and primary face painter for Face Paint Pizzazz. Her artwork has appeared in The Colored Palette and SkinMarkz magazines. She services the western and northwestern Chicago suburbs, Chicago’s north side, the greater Rockford area, and southern Wisconsin. Stop by Clownantics.com to enjoy more of Beth’s face painting tutorials.


Leave a comment (all fields required)