 FREE SHIPPING FOR USA ORDERS OVER $50


Girls need superheroes too, right?
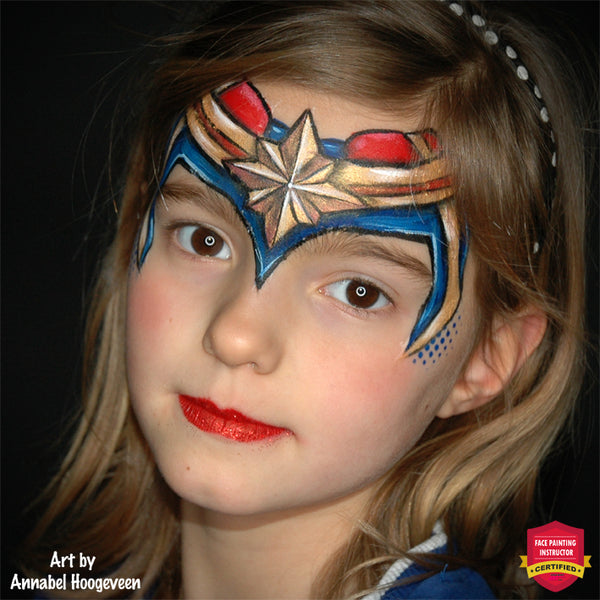
With the release of the new Marvel Studios movie 'Captain Marvel' they have a new one: Captain Marvel, one of the galaxy's mightiest heroes and a very tough and beautiful lady.
With the release of this movie in March we definitely need to have a design for this beautiful lady-superhero.
And although she has a very cool and fierce mask of herself, I decided to use her outfit instead to create a crown like design, that didn't cover the eyes. Hope you like it 🙂!
Supplies:
Sillyfarm Artycake 'Fairy Blossom' (Nat's Gold Edition Collection)
Mehron Beach Berry Red
Mehron Lagoon Blue (or any other blue you like)
PartyXplosion White
PartyXplosion Black
Small flat or angle brush (1/2# or less, depending on the size of the forehead)
Small filbert brush
Loew-Cornell round brush #3
Loew-Cornell round brush #2
Cameleon blending brush #1
Ultimate Graffiti Eyes Stencil Kit (Léa Selley)
Sponge dauber
Lip gloss applicator
Paradise glitter 'red'
Kryolan 'Youth Red' blush
Small kabuki or powder brush

Step 1: Sketching the Outlines
I started this design with a quick sketch, to find the proper placement. The size of the forehead can differ very much between kids. So, with a forehead design like this one, I like to sketch first to see if I need to adjust my initial design (and I did 😉).
For the sketch I used a glycerin based white in a watery consistency and a small round brush (#3).
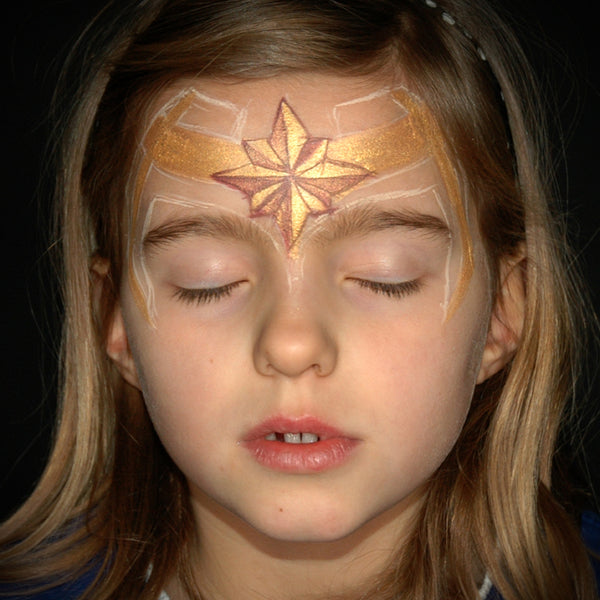
Step 2: Filling in the Golden Band and Star
Using a small angle brush (1/4#-1/2# depending on the size of the forehead) and Natalee Davies's Fairy Blossom split cake I filled in the golden band and star. I started with loading only the gold from the cake and painted the band, the side stripes and half of the sections of the star. Next I loaded the same brush with the darker colors of the split cake and filled in the empty spaces in the star.
In this star I made a little mistake, because I painted two pieces that were next to each other in the same color. I think it is better to paint them alternately (one piece gold, one piece using the darker colors from the split cake). I will add a separate SBS for the star at the end of this blog 😉.
With the tip of the brush I quickly added some outlines to the star. Normally I would use a thin round brush or a liner, but this time I needed to be quick because my little model was very wobbly and tired.
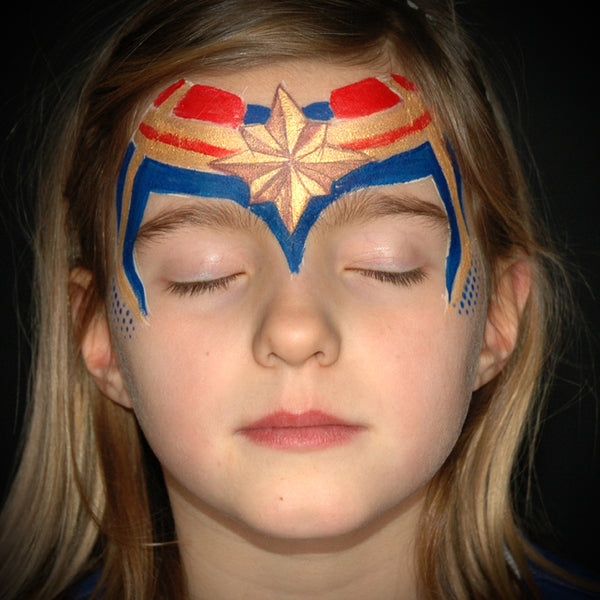
Step 3: Filling in the Empty Parts
Next I painted the blue parts of the crown with a small filbert brush and blue paint, and the red parts with the same brush and bright red paint.
Using one of Léa Selley's Ultimate Graffiti Eyes stencils and a sponge dauber loaded with the same blue, I added some texture on the cheeks.

Step 4: Adding Black Outlines
Using regular black paint and a small round brush (#2 or #3) I outlined all the different elements and even all the different parts of the star.

Step 5: The Finishing Touch: Shading and Highlights
With a small blending brush that I moistened on a wet wipe, I went over some of the black outlines in order to make them 'softer' and add some shading. The shading I placed especially underneath and on top of the golden band and around the star to give those elements a more 3D look.
Then I loaded a round brush #3 with regular white and added a few highlights on the edges of the design and on the golden band and star.
Next I painted the lips using a lipgloss applicator and bright red paint. While the paint was still damp I added red glitter on top.
Last but not least I decided to add some blush on the cheeks with a small kabuki brush for extra color.
All done! Now this Captain Marvel is all ready to go and win some battles ☺️!!
The Star: a Step by Step
These are the steps you can follow to create the star. It seems a lot of work at first, but once you know the idea and know how to place the colors of your split cake correctly, it is perfectly doable on a job 🙂!

The original sketch for this design (on a board) had a bigger star, that looked nicer (and more crisp) than the one on my model. Bigger stars are easier to fill in with a splitcake, resulting automatically in a clear 3D effect. Unfortunately I had to improvise a little on my model, because there was far less space than I expected, and my star had to be much smaller. But as long as you paint some of the sections lighter than others, it will still look cool 😁.
I hope you enjoyed this tutorial. And if you try it, please tag me! I love to see your versions 😃!

__________
Want to have Annabel as your personal instructor? Take a Class at the International Face Painting School.
Annabel Hoogeveen is the owner and founder of 'Blije-Snoetjes Kinderschmink', a Facepainting company and school in the Netherlands. She is painting for about 10 years and is passionate about teaching others how to facepaint, 'because the more face painters there are, the more kids we can make happy'.
Annabel likes colorful and easy 'on-the-job' designs. But, as a former vet, she also has a passion for painting realistic 3D animals.
She is an instructor at Olga Murasev's International Face Painting School (www.facebodyart.com), has written several Facepainting blogs and recently won the 'Black Panther' competition here at Facepaint.com.
You can see more of her work on her Instagram and Facebook pages.


Leave a comment (all fields required)