 FREE SHIPPING FOR USA ORDERS OVER $75


Super heroes are always popular with both boys and girls. After all, who wouldn’t wan’t to be a super hero, even if only temporarily? If you struggle with super hero masks, I hope this tutorial will make your efforts at a basic Captain America-inspired mask more successful.
Materials
• Paradise dark blue face paint
• Diamond FX metallic blue face paint
• Paradise silver face paint
• Paradise light blue face paint
• TAG light blue pearl face paint
• Diamond FX black face paint
• Wolfe white face paint
• 1/2-inch flat brush
• #5 round brush
• Lining/rigger brush
• Dot stencil
• Sponge
Tutorial
Begin by loading your 1/2-inch flat brush with a combination of Paradise dark blue and Diamond FX blue metallic. I put these together in one well in my kit so I can get the advantages of both when I need a dark blue color. Create your mask shape on the face, asking your model to close his eyes while you work around them. (This is a good safety precaution, but it also helps keep children from moving their facial muscles and head while you work.)
It’s important to thoroughly mix your water and paint so you have a nice, creamy consistency. This tip is from a workshop taught by Olga Murasev, and it’s why her face painting has a beautiful, opaque look on the skin. If you don’t do this, you’ll be able to see the skin through in some places and your mask will look sheer, especially when using dark blue colors.

Sponge a combination of Paradise light blue and TAG pearl light blue on the outer forehead and below the outer eye area to create a highlight on the mask.
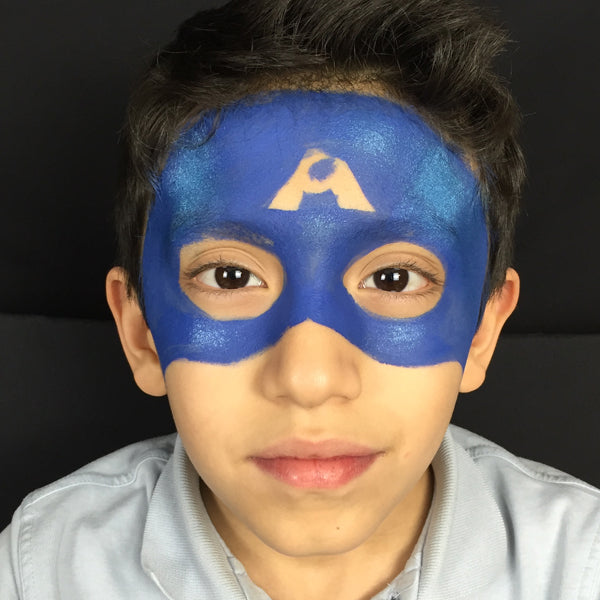
Use a #5 round or a small flat brush to paint a letter A in the center of the forehead with metallic silver.

With the #5 round brush, add some super hero eyebrows with your lining black. With your more slender rigger or lining brush and black, carefully add an outline below the mask and some lines coming down through it over the outer forehead and below the eye as pictured. (At this point, if desired and if you have time, you could also add a small shadow below the edge of the mask.)
Outlining the A with black is optional as well, depending on the time you have available, but I did it in the next step because I felt it defined the edges better. I also added a few small lines at the corners of the eyes for visual interest and realism.

Using your liner and white, add a highlight to the lines coming through the mask as well as at the corners of the eyes.

As a final step, use a dot stencil to add some visual interest to your superhero mask. While I didn’t add a shadow below the mask edge, I did use the dots to create a stylized shadow on the outer edges of the cheeks and at the temples. Corey Morgan uses dot stencils to do this in his classes, and I loved the affect so much that I’ve begun incorporating them into most of my super hero masks as well.


Thanks for stopping by for the tutorial this week!
Beth MacKinney is the owner of and primary face painter for Face Paint Pizzazz in the NW Chicago suburbs. Stop by the Clownantics.com blog for more of Beth’s face painting tutorials. Beth also writes for Examiner.com as the Chicago Face Painting Examiner.


Leave a comment (all fields required)